Hardening the Home, Part 2: Up-Armor Your Security

In the second installment of this series, we will discuss the how of increasing your home security. I’ll be talking about how to use the diagram that you made in the first article. We will talk about how to negate the weak points of your house’s layout, and light up the dark spots. We will list some inexpensive physical security upgrades, early warning methods, and some ideas about how to project the illusion of extra security when you might not actually have it. Remember that our goal is to appear to be a harder target than the folks next door (sorry neighbor Bob). Everything I mention in this article are things I have done to my home. All of the upgrades are budget minded and doing all of them totals less than $250.

I knew my home was projecting the appearance of security when my neighbors reminded me this was a ‘good neighborhood’ and asked why I had my house lit up like a Christmas tree at night.

We want our homes to appear unappealing from the street, unappealing from close up, be difficult to enter by actually reinforcing entry points, have early warning systems in place to alert us to intruders, and we need to have a ‘safe room’ and a plan established to fall back to if all of the precaution fails. Let’s build our layers of security for the home.

Home Security, like Ogres and onions, are layered

Layer 1: From the Street

Like we read about in the interviews with burglars, the first thing bad guys look for is the appearance of alarm systems. Some then test to see if there is actually an alarm system and will abort the burglary immediately if an alarm is triggered. As a result, you should either go all the way and get an alarm system installed, with battery backup and SMS cell tower dial-out so that power outage or a phone line being cut don’t affect the police being called. Barring this, start by purchasing security system signs and decals. Put the big sign by the mailbox and paste the stickers on windows and doors on ground level.

Keep your shrubs and hedges trimmed in such a way that there are no hiding spots from the road. If you have a basement window that is hidden by a thick bush, it makes a great entry point because it conceals the burglar’s movements. Keep things trimmed up. If you can’t, you should consider planting bushes that have thorns and would make crawling past uncomfortable. I cut down a large decorative tree that was obscuring the front door from the street (not to mention it was ugly) and the wife and I purchased bushes that we could keep under control while still looking nice.

IMG_4761
The ugly ass tree is now in the burn pile.

Use the lighting diagram you made from the last post to find the darkest parts of your house. If there are entry points there, fix that. Purchase motion sensing flood lights and install them. You should light the dark areas whether you can see the areas they illuminate or not. They are simple to install, just make sure you don’t zap yourself. If you happen to have an area that doesn’t have an existing fixture, the MicroSolar Outdoor Solar Motion Sensor Lightis outstanding. I installed one in the dark zone of my home and it’s bright and waterproof. I highly recommend it. We’re livin’ in the future, I tell you…

photo
Light where you need it.

If you want to get fancy, you can buy Security Cameras and mount cameras to monitor your home 24/7. When I was in Atlanta, I had a four camera system. Two of the cameras monitored the street in both directions, one camera watched the front door, and the last camera watched that camera and the front windows to make sure no one tampered with the door camera. I recall at least two occasions where casual passersby noticed the cameras and started talking about it to themselves. I was glad they noticed them. Being obvious is good.

My neighbors didn’t have any installed, and a wannabe home invader nearly broke past the front door when they opened it for them (reminder: you don’t have to open the door just because someone knocks). I’m not saying it prevented an attempt on my house, but I know that no home invaders tried to push past my wife into the house as they did to the neighbors. If you want to go more budget minded, you can buy a few Dummy Security Cameras and put them in obvious places visible from the street. I would try to make the dummy cameras obvious, but with the real cameras I’d be more strategic so that they aren’t easy to disable without being seen by another camera. Think interlocking fields of fire.

Layer 2: From Up Close

Here are some ideas that will help if the first line of deterrence fails. These are things meant to deter if someone is in close proximity to the house and possibly peeking past blinds and attempting a rouse to see who might be home before doing the deed.

Have sheer blinds on the ground level at a minimum. No one should have unfettered visual access to your house. Window shopping is fine at the mall, not at my house.

Having a dog is a great idea. More dogs is more better. They give good kisses, they’re loyal to the death, they will keep you warm on the couch, and a barking dog is a well known deterrent for burglary. I would suggest you not get a dog only for home defense, because they get expensive. I really am quite fond of ours. Consider that a burglar might check to see what parts of your house the dogs can’t get to and break in there. That’s just something to think about.

photo (3)
Blood Thirsty Savages.

If you don’t want a dog, then why not make it seem like you have a dog? Get a well chewed toy from a friend’s dog, a water bowl, and maybe a  ‘Beware Of Dog’ Sign and hang it on the fence. Plant the seed of doubt in the bad guy’s mind.

Get an old radio and a lamp and put them on a cheapo Lighting Timer. Have the radio play during the day and the light come on a few times at night. Most burglars don’t want to tangle with the home owner.

Don’t leave the tools of the trade laying around your house. The ladder under your porch? That makes a great escalator to reach your second story. The hammer you left by the garage? Universal key. Don’t make it easier for them. Put a bike chain on the ladder rungs and lock it to your porch. Clean up your tools.

Don't do this, silly.
Don’t do this, silly.

Layer 3: Physically Harden the Entrances

If you have old style wooden framed windows, Security Pins are cheap and easy reinforcement. All you need to install them is a drill. If you have newer vinyl windows, Vinyl Window Lock simply tighten to the track, and prevent movement of the window. Be sure to keep the key to the pins on the top of the frame of the windows so in case you need to open the windows in a hurry (FIRE) you can.

photo (2)

If you have deadbolts, be sure the ones near windows are keyed and you remove the keys when not in use. Being able to  smash the window and unlock the deadbolt sort of defeats the purpose.

Consider removing or putting a security film on the windows of your garage.

Installing Security Strike plates is another simple upgrade that anyone can do. I had no trouble completing the job using a drill and a dremel tool. Make sure you match the existing hardware colors, because wives don’t like mismatched door hardware (ask me how I know). I have read in several places that the average amount of time a burglar spends trying to gain entry is about 60 seconds, then they lose interest and look for greener pastures. The increased number of longer screws and thicker gauge metal should both help to slow entry. This buys you time if you’re home during the break-in and might make a burglar fear too much attention if he has to keep kicking the door if you’re not home.

photo 1 (1)
6 – 3″ screws is more than 2 – 1/2″ screws. It’s science.

Layer 4: Early Warnings

Let’s say today is your day. The guy is coming in, brought the right tools to defeat your reinforcements (or you left something unlocked or wide open), and found a door that your dogs can’t reach. If you have a monitored alarm system, hopefully this is where that takes over and the coppers are on the way. A huge fear of mine is waking up and the bad guys are right outside the bedroom. The lack of time makes my palms sweat. That would be a bad day. Let’s say you don’t have the option of a monitored alarm system. What can you do?


Put an old baby monitor in a distant room, and the receiver in your bed room. If someone starts shuffling around in the garage or basement, you’ll hear it. Plenty of time to get the cops on the line and get your gear on.

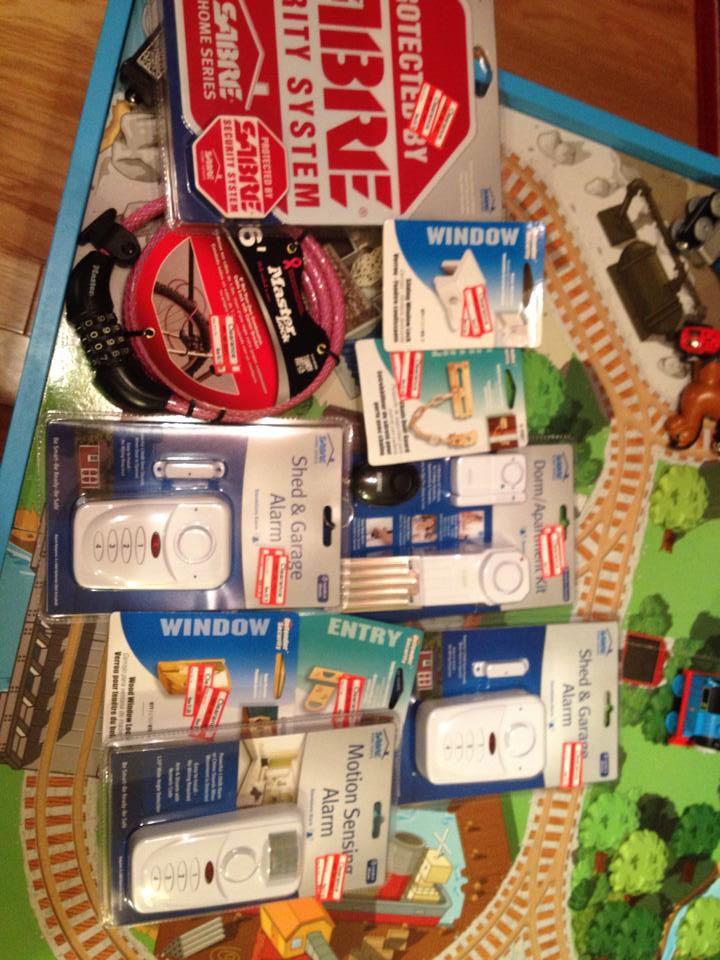
This Security Alarm Kit is great both as a deterrent and as an early warning. They are LOUD. The units work via a magnet that keeps the alarm silent when it’s next to the unit, and sets it off when it’s separated. It will shut off as soon as the magnet is put back in place. My personal hope is that as soon as the 120 dB alarm starts blaring, the bad guy remembers a previous engagement and leaves. I have several of these strategically placed in the remote areas of my house and I can hear them from anywhere in the house. I’m really pleased with these so far. They also work well for apartments or dorm rooms. Recommended.

10357170_10101073428163279_4323596026564983677_n

Place a convex mirror (I used a baby car mirror) outside of your front door, where you can see it from your peephole. Put it in a place that allows you to see the blind spot to the immediate left and right of your door. Being able to see 180 degrees outside of your front door gets rid of any hiding spots that someone could use for an ambush when you open the door for that nice gentleman who needs to use a phone.

“Pardon me, You got any of them phones I can use?” Seems legit.

Layer 5: The Safe Room

We’ve discussed this briefly in previous posts. There’s also many resources about this online. Do some googling and reading.

Layer 6: You

I’d be remiss if I didn’t remind you that in order for all of this gear to work, you have to have the Mindset to implement it. You have to have the presence of mind to set your alarms, change the batteries, lock the doors, not open the door for just anybody, not leave the new flat screen TV box visible to all passersby on trash day, create plans and train your family, and so on. We are usually our home’s biggest security weakness. Be a tougher nut to crack.

Protect the Brood,

Defensive Daddy.

The Universal Draw Stroke

“The Draw Stroke is the Draw Stroke is the Draw Stroke.”

-Paul Gomez explaining the drawstroke from several unorthodox positions

Paul Gomez, the personal protection integrator who passed away well before this time, once said that simple phrase that has stuck with me ever since. He was good about quips that you would have to contemplate and reflect on. At the time, the realities of self-defense and ‘The Fight’ were starting to become clearer to me. I realized that if I had to use my gun, I wouldn’t be slapping iron at noon in a dusty street while the town folk were watching from the front of the saloon (Insert your own personal gunfight fantasy).

Skin that Smoke wagon!

Upon watching and reading about the dynamics, lighting conditions, circumstances, terrain, distances, number of criminals, and locations in defensive shootings (gun fights, or gun battles) there was only one thing that was consistent. This is that the good guy didn’t get to choose when it went down. We, as the reactionary party, are attacked when it’s the worst possible time for us, and the best possible time for them.

As I wrote about in practice by the odds, a person should spend most of their time/resource constrained practice time working the most likely needed skill sets and streamline their mechanics to cover the widest set of circumstances one possibly can.

Your gunfight (hopefully we get lucky enough to make it a shooting instead) might be at thirty feet in a parking deck, at arms range in bank, in the hallway outside of your child’s room, in the front seat of your car, or on your back next to an ATM. So how can we as responsible and thinking gun owners, try to account for as MANY of these scenarios as possible with one set of mechanics for getting our gun into play? We can’t try to do something different for each scenario and have a different way to get the gun into play for each one. The decision tree quickly branches into an unmanageable (and slow) pile of options. The method of ‘if this, then this’ is why certain martial arts fall apart under pressure.

When I punch like this, you block like that… No higher.. a little left… OK perfect.

So we need a draw stroke that works within as many of the scenarios as we can imagine. We need an ‘if anything happens, you only need this one movement’ type of thing. Luckily for me, there are guys like Gomez, Craig Douglas, Greg Ellifritz, Cecil Burch, Chris Fry, James Yeager, Paul Sharp, Larry Lindenman, Aaron Little, and all of the gentlemen and scholars that teach a robust universal draw stroke and it’s integration into a self defense program.

The universal draw-stroke is so useful because with one mechanic we can handle probably 99% of all scenarios that one could imagine. It works while standing, lying, seated, while grappling, in a competition, from appendix or behind the hip, in a retention position, whatever you’ve got.


The Steps

  1.  Clear obstructions which could foul building a full (fuckin’) firing grip. This one can be deceptively complicated. In the simplest case with an open top holster in a shooting range, you can actually skip this step completely. Slightly more complicated might be breaking holster retention devices or clearing concealment garments. If seated, you might have to clear garments and a seat belt. If you’re in a fouled up tangle (gun grapple) of arms and legs, it might mean doing an arm drag and controlling the nearest arm to the gun. This step has the most depth of any of the parts of the draw-stroke. You can go deep deep deep into training all the complications that this one step can cause.
  2. Establish a full firing grip. Building the grip with all of the proper index points is key. This is the first, and probably last time in your fight that you’ll have to build a good grip. Get a lot of practice and make it count.
  3. Begin an efficient (no wasted movement) draw in which the gun is never lower than it was a moment before. Keep your elbows from tracking away from your torso. Being in proximity to non-involved parties that you don’t want to hang up on while drawing and opening holes between your arms and your torso for the bad guy to control your arms being the primary reasons.
  4. Move to an indexed position of retention. This is important because you may need to shoot with someone in contact with you, swinging a pipewrench, or otherwise in your intimate space. If you need to shoot from here, you can stop your draw and begin shooting.
  5. Move the gun to a horizontal position under the dominant eye. Your hands can come together at this point. Or for one handed shooting, you can begin pressing the gun out to full extension. While the gun is coming out, you should be bringing the gun into the eye-target line as quickly as possible. This gives you time to refine your sight picture as you are reaching full extension, which will allow you to start shooting quicker.

Example Photos:

Gun behind the hip.
Gun behind the hip.
IPhone Photos Dump3
With ‘appendix’ carry, the retention position is a small diversion from the straight line draw. It’s easy to fall into the retention position as needed, however. My body is a bit more bladed than I intended in that photo. Ideally, I’d be more square to the target.
IPhone Photos Dump
Clear seat-belt, clear garment, draw as needed.
IPhone Photos Dump2
Grounded
Collages4
Standing grapple

In Closing

I think spending the time to drill and ingrain this draw-stroke is time well spent. Having the framework to shoot from different positions without having to think about the mechanics is crucial. You’ll have enough other things to think about. When learning this draw, you should seek training under a watchful eye so you learn all the nuance involved. When you’re drilling and learning this draw, strive for perfect repetitions. Try to hit all of the index points so you will have the kinestetic awareness of how your body feels and where it is in space. I would pause at each way point along the way, imagining myself as a robot moving perfectly.

What you’ll probably find is that when you’re going for supreme speed in a competition or when you know you’re shooting at distance, the sharp corners of your draw will ’round’ and you’ll move in a more direct path to the target. That’s OK. You’re a thinking being and you will know when it’s appropriate. Having a framework to fall back on is what matters here. One Draw Stroke to rule them all… or something.

Getting Training

Here’s a list, in no particular order, of some trainers who can teach you this stuff:

Hardening the Home, Part 1: A ‘Case’ Study

This article will be about how to evaluate your home’s curb appeal to burglars and other scumbags who want to take your stuff and kick your door in while you’re watching TV at night. It will be holistic approach that will build layer upon layer of security without spending an inordinate amount of money. I will be using my house as a ‘case’ study (without giving away too many personal security details) to illustrate the methodology for doing this. In future posts, I’ll highlight the specific upgrades that I’ve done to deselect and harden my home from criminals.

Mission: Systematically evaluate our own homes for vulnerabilities and weaknesses to burglaries, and then harden our homes both physically and by projecting strength with simple budget minded improvements.

What are Burglars looking for when they are choosing a target?

I had been researching and reminding myself about all of the home invasion and burglary statistics I could find over the last several weeks. Then, like a tactical angel, Greg Ellifritz shared a very timely post with some stats and information that was new to me (and more recent). In it, he links to a really neat study “Understanding Decisions to Burglarize from the Offender’s Perspective”. I encourage you to read Greg’s summary of the study so you can get an idea of what sort of person we’re looking at, what they want, how they choose their targets, and what deters them.

For this article, we’re only really interested in what deters them. Here’s a quote from the study,

“Close proximity of other people (including traffic, those walking nearby, neighbors, people inside the establishment, and police officers), lack of escape routes, and indicators of increased security (alarm signs, alarms, dogs inside, and outdoor cameras or other surveillance equipment) was considered by most burglars when selecting a target”

“About 60% of the burglars indicated that the presence of an alarm would cause them to seek an alternative target altogether. This was particularly true among the subset of burglars that were more likely to spend time deliberately and carefully planning a burglary.”

We want to use these facts, and our own common sense to deter and deselect our homes from burglaries and harden against home invasion. To summarize:

The Layered Approach

In order to successfully deter this sort of crime, we need to have a layered approach. We need to project our security to the street, to dissuade bad guys who are ‘shopping’ for a home to burglarize. We must physically harden the points of entry so that if we DO get chosen, we make the entry as difficult as possible. If we can’t harden a point of entry, we have to provide ourselves an early warning to the intrusion. We must lastly have our safe room prepared so that we can have place to make our last stand.

Case Your Own House

  • Walk as far away from your house as you can while still maintaining a view of your house. How far away can you be and still see your home? If you have woods, walk into the tree line, and see what you can see. What doors, windows, entrances can you make out? Are there any shrubs or bushes that block your view of a window or door? Are there any windows without shades or blinds that you can see into? If someone were standing in these perimeter points, would they have a reason to be there besides casing your house (across the street at gas station, for instance)? In urban areas, look to see if you see evidence of people loitering in these observation points (cig butts, spit, empty cans, etc.)
IMG_4760
The large magnolia generally occludes the view from the street. This house was purchased partly because it sits in a cul de sac, in a quiet neighborhood, has a brick front, and large trees spaced around the house for privacy.
  • Now as you walk back, look at routes towards your house. Are there any obvious routes towards the entrances? Are there any natural or man-made obstacles in the way? Anything that would have to be disturbed that you would notice out of place if someone moved towards your house? Are there any fences or natural obstacles? Would these fences hide nefarious activities?
  • Look into your windows. What can you see around shades, between blinds, and through the side lights around the front door? Do you see anything of value like your computer, office, TV, so on. Where could you hide right up against the house that can’t be seen from the inside?
  • Have a friend walk around the perimeter of your house while you stand in different rooms of the house. Where can you see them as they approach the house? Are there any routes that keep them hidden as they approach? How close can they get before you hear them? What does the front porch sound like when someones walking on it? How about the crunchy pea gravel behind the house? Pay attention to how things sound when someone is encroaching on the house.
  • Look at where your external lights illuminate. Are there areas that your motion sensing floods don’t reach? Remember, you want to illuminate both areas you can see, and those you can’t.
IMG_4762
The “Dark Side of the House”. A few entrances, not many lights, minimal view from inside the house. This is the area that I would ‘harden’ first. And have…
  • Look for overgrown shrubs and trees that could hide a bad guy’s movement. Trim the hedges back so that you can see the windows from the road. Burglars aren’t in the business of being seen.
IMG_4761
That evergreen to the left of the stairs has to go. It blocks the front door (framed in side-lights) from view of the road. The bushes on the right are also getting too tall.

MS PAINT DIAGRAMS!

Now I want you to find your house on google.maps. Take a screenshot of the aerial view and paste it into MS Paint. Draw lines that correspond to your view from inside the house looking out. Also draw lines that show where your flood lights or spot lights shine. You will quickly get an idea of the areas that demand attention first. You will see the obvious approach routes, and the places that would be darkest for a bad guy to work. You can get quite elaborate here. You could document which bushes need to be trimmed, where you need shades in the house, and so on.

 arialhouseIn Closing

This is the first step in hardening your house. Think like a bad guy as much as you can. Be devious. Where would you break in? When would you break in? You have to build a plan to break in. Then you have to shut down your own plan with some simple and inexpensive upgrades. We have quickly evaluated how enticing our house looks to potential bad guys. In subsequent posts we will discuss simple tactics to bluff that you have more security than you do, some hardware associated with hardening the house, early warning systems, lighting choices, and the safe practices and the mindset it takes to keep ahead of home invaders and burglars.

Protect the Brood,

Defensive Daddy

Reference:

Jim Grover, “Street Smarts, Firearms, & Personal Security”

Mundane Movements: Parking Lots, Part 2, Exiting the Store, Loading your Vehicle, and Going Home

After our shopping is done and we tuck that impulse bought stuffed animal in with the little one, it’s time to go from the relative safety of the store back out into the world. We can break this down into phases and have plans for each phase of getting back to the car. We have to leave the store, walk to the car, unload the groceries, load the baby, get ourselves in the car, and drive away. Each of these phases will afford us unique options for maneuver and tactics. I’ll list the phases, and in a later post discuss some of the tactics we can use in case things start going sideways.

Before we coast back through the front door towards our perfectly parked car, there’s a few things I’d like you to do:

  1. Stop. Put your receipt away, put your wallet back in your pocket, and be in the moment.
  2. Hang up your phone. The conversation can wait. Voluntarily eliminating 180 degrees of your peripheral vision while simultaneously using spare mental processing power for a conversation is just asking for problems. Hang it up.
  3. You don’t need a soundtrack to walk to your car. Remove the ear phones if you rock out while you shop.
  4. Get your car keys in your hand before you leave the store. If you’re carrying groceries, carry them in your non-shooting hand. If you’re carrying your child, carry him/her in your non-shooting hand. Your shooting hand should be holding your keys. This eliminates embarrassing and time consuming fumbling in pockets or purses once you’re at your car door. The longer your attention is fixated on a small area, the more time you are not keeping your head on a swivel looking for any unfolding situations.
  5. As a pro-tip, I HIGHLY recommend carrying an OC (EDIT: Pepper Spray) keychain on your key ring where legal. If you follow our rule to have your keys in your hand, then you ALSO have a less-lethal option in your hand. Note that not all pepper sprays are created equal. It is best to avoid the gas station pepper sprays, and ante up for a quality brand, and even some training cartridges so you can practice. I personally can recommend Sabre Red – Spitfire or the ASP key/palm/street defender Upon approach by an unknown contact, it is easy and non-threatening to throw up a fence and have your OC in perfect position to deploy if the situation escalates. The Man to see about learning how to employ the fence from managing the initial contact, to initial assault, to gun deployment is Craig Douglas of Shivworks. Don’t miss an opportunity to train with this man.

    The Fence – Shown by Craig Douglas – codified by Geoff Thompson. Google it!

Phase 1: Leaving the Store

As you break through the threshold into the parking lot, snap a glance left and right towards those hard corners at the edges of the building. Look for loiterers, rapid movement, changing movement patterns and people paying attention to what you’re doing. If you notice something strange near the entrance, turn around and head back into the store, or head in an oblique direction to where you parked. After you walk 50 or so feet away from your car and finally make a sharp turn towards your vehicle at the other side of the lot, they will either be forced to follow your erratic movement and give themselves away, or break off and wait for the next one. This is a cheap and easy method of surveillance detection.

Phase 2: Movement Through the Parking Lot

Walk towards your car, stealing glances at the folks in the parking lot. You’ll see most of them staring at their shoelaces, playing with phones, or zoned-out staring at the entrance of the store contemplating what pizza rolls they wanted. You’ll also immediately notice others who are paying as much attention as you. You’ll probably incidentally meet eyes with them. Give them a nod. Either they’re good guys running in condition yellow like you, or you just let a predatory actor know that you’ve seen them. This is usually enough to dissuade opportunistic predators. As you move along the parking rows, play the game of looking for places to quickly position the buggy (with baby) in a safe position of cover or concealment in case the need arises. Unlike the short post about shooting while carrying your child, we might have our baby secured in a buggy which allows for us to draw aggression to ourselves while trying to regain initiative. You have more options when your baby is not occupying your hands. Making these sorts of activities a game allows it to become habitual and is less mentally fatiguing. This phase of movement is probably when you will be selected for the criminal interview that will probably start as you approach your car.


Phase 3: Unloading your groceries

Unlock your car and stow your keychain/OC combo in your waistband or pocket. I like to park the buggy with baby still buckled in, between my car and an adjacent car. The name of my game is ‘avoiding task fixation’, so I try to not go more than thirty seconds without a quick glance around. Again, practice this and make it a game. Unload your groceries, lock your car, unstrap your baby and pick them up, and return your cart to the corral (Do your part, cart jockeys have a rough life). Get back to your car by following the previous strategies.

Phase 4: Loading your Child

I have an entire post in the works regarding how to mitigate risk when securing a child in a car seat. For now though, let it suffice to say that the more often you can break your attention away from securing the little one, the better.

Phase 5: Driving Away

There is no magic here. Get in, start the car, put it in drive, and GO. The mistake I see people make ALL the time is starting the car to let it cool off and immediately picking up the cell phone to start texting. I have watched people sit in their cars for 5 minutes without the first glance around. You simply can not afford to be immobile, occupied, and unaware.

In summary:

I know this post was sort of long winded and had lots of repetition. The reality is that it doesn’t take too much extra work to deselect yourself as the easy mark. Consistency is key.

In future posts on this subject I will cover the car seat conundrum, some ways to shut down approach stories, developing a verbal playback loop, Pepper Spray considerations, options on tactics if guns need to come out, and whatever else I can think of. Let me know if you do things differently and what you’d like to hear about. I’m genuinely interested in learning a better way of doing things. My knowledge was built by keeping an open mind and standing on the backs of the brilliant thinkers that have come before.

Let’s learn together!