I wanted to post this article from Rebecca Bahret of SheKnows.com. It’s about the mental rehearsal (brainstorming) of emergency situations so that in the event of an actual emergency there is less time spent thinking and more spent doing.
“Every time I drive over a bridge with my children in the car, I envision us getting into an accident and plunging over the side into the water below. I then go through my “what would I do” checklist, ending with us being rescued and — most importantly — surviving. I was pleasantly surprised by the number of my Mommy friends who commented that they did the same, not just with bridges but with most potential high-stress situations. Then it hit me: We were all unknowingly participating in a training practice I learned back when I was a cop called crisis rehearsal.”
This mental rehearsal and imagery goes by many names. Athletes use it all the time. I was taught from an early age that practicing perfect repetitions in my mind would improve performance when it came to physically performing a task. I used this technique to maintain my shooting proficiency while I was recovering from my stem cell transplant five years ago. I literally had no quantifiable degradation in skill, though I wasn’t able to shoot a gun for 9 months or so. This stuff works. The mind is the most important training tool.
I use this daily, from looking for the nearest exits in restaurants to picking an aiming spot on questionable characters that I cross paths with (“If this goes bad, I’ll shoot this guy right there”).
Dr. William Aprill tells a story in his lectures about a woman who witnessed a brutal murder in her neighbor’s lawn. The bad guy chased her neighbor into her back yard, and stabbed her dozens of times in the chest in the middle of the yard. The neighbor witnessed this, and when questioned by the police if she had last see her neighbor she said, “Yeah, I saw her earlier today, she was in the backyard planting flowers.” The woman hadn’t even wrapped her head around the idea that she might see someone stabbed to death, much less her neighbor, so her brain created it’s own story to fill the gaps. The digging motion she saw was her neighbor being murdered. Like Dr. Aprill says, “reserve a parking spot in your mind” for such acts, and you’ll be able to act more rapidly to a developing situation.
As The Tactical Professor points out in his “Wargaming vs Brainstorming” series, you can take brainstorming scenarios to a higher level by wargaming them. You should read this series if the topic interests you. Part 1, Part 2.
In the second installment of this series, we will discuss the how of increasing your home security. I’ll be talking about how to use the diagram that you made in the first article. We will talk about how to negate the weak points of your house’s layout, and light up the dark spots. We will list some inexpensive physical security upgrades, early warning methods, and some ideas about how to project the illusion of extra security when you might not actually have it. Remember that our goal is to appear to be a harder target than the folks next door (sorry neighbor Bob). Everything I mention in this article are things I have done to my home. All of the upgrades are budget minded and doing all of them totals less than $250.
I knew my home was projecting the appearance of security when my neighbors reminded me this was a ‘good neighborhood’ and asked why I had my house lit up like a Christmas tree at night.
We want our homes to appear unappealing from the street, unappealing from close up, be difficult to enter by actually reinforcing entry points, have early warning systems in place to alert us to intruders, and we need to have a ‘safe room’ and a plan established to fall back to if all of the precaution fails. Let’s build our layers of security for the home.
Home Security, like Ogres and onions, are layered
Layer 1: From the Street
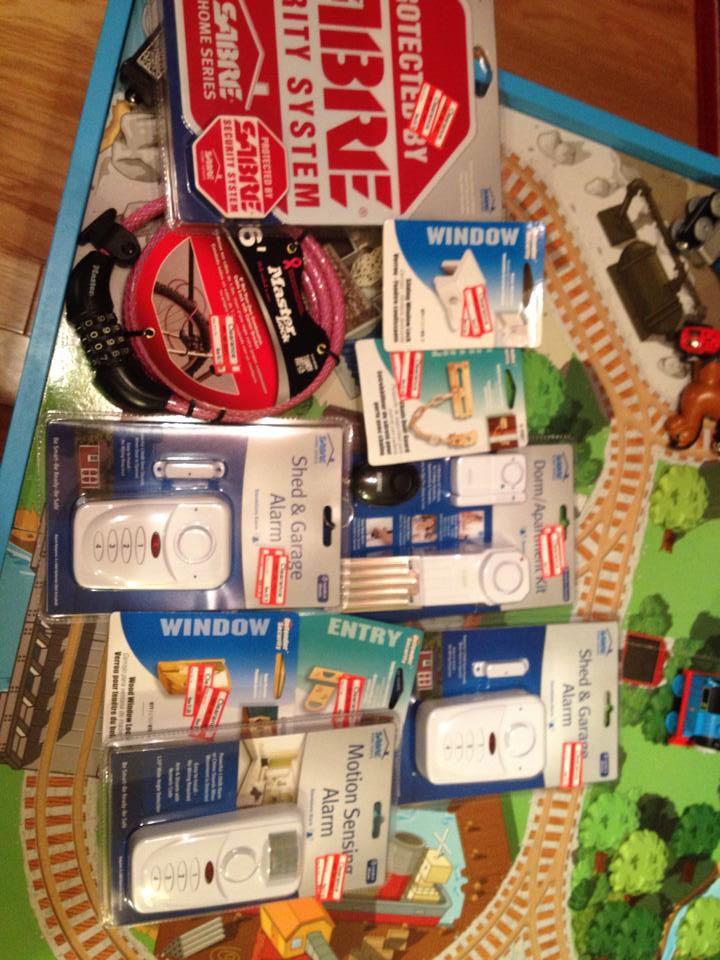
Like we read about in the interviews with burglars, the first thing bad guys look for is the appearance of alarm systems. Some then test to see if there is actually an alarm system and will abort the burglary immediately if an alarm is triggered. As a result, you should either go all the way and get an alarm system installed, with battery backup and SMS cell tower dial-out so that power outage or a phone line being cut don’t affect the police being called. Barring this, start by purchasing security system signs and decals. Put the big sign by the mailbox and paste the stickers on windows and doors on ground level.
Keep your shrubs and hedges trimmed in such a way that there are no hiding spots from the road. If you have a basement window that is hidden by a thick bush, it makes a great entry point because it conceals the burglar’s movements. Keep things trimmed up. If you can’t, you should consider planting bushes that have thorns and would make crawling past uncomfortable. I cut down a large decorative tree that was obscuring the front door from the street (not to mention it was ugly) and the wife and I purchased bushes that we could keep under control while still looking nice.
The ugly ass tree is now in the burn pile.
Use the lighting diagram you made from the last post to find the darkest parts of your house. If there are entry points there, fix that. Purchase motion sensing flood lights and install them. You should light the dark areas whether you can see the areas they illuminate or not. They are simple to install, just make sure you don’t zap yourself. If you happen to have an area that doesn’t have an existing fixture, the MicroSolar Outdoor Solar Motion Sensor Lightis outstanding. I installed one in the dark zone of my home and it’s bright and waterproof. I highly recommend it. We’re livin’ in the future, I tell you…
Light where you need it.
If you want to get fancy, you can buy Security Cameras and mount cameras to monitor your home 24/7. When I was in Atlanta, I had a four camera system. Two of the cameras monitored the street in both directions, one camera watched the front door, and the last camera watched that camera and the front windows to make sure no one tampered with the door camera. I recall at least two occasions where casual passersby noticed the cameras and started talking about it to themselves. I was glad they noticed them. Being obvious is good.
My neighbors didn’t have any installed, and a wannabe home invader nearly broke past the front door when they opened it for them (reminder: you don’t have to open the door just because someone knocks). I’m not saying it prevented an attempt on my house, but I know that no home invaders tried to push past my wife into the house as they did to the neighbors. If you want to go more budget minded, you can buy a few Dummy Security Cameras and put them in obvious places visible from the street. I would try to make the dummy cameras obvious, but with the real cameras I’d be more strategic so that they aren’t easy to disable without being seen by another camera. Think interlocking fields of fire.
Layer 2: From Up Close
Here are some ideas that will help if the first line of deterrence fails. These are things meant to deter if someone is in close proximity to the house and possibly peeking past blinds and attempting a rouse to see who might be home before doing the deed.
Have sheer blinds on the ground level at a minimum. No one should have unfettered visual access to your house. Window shopping is fine at the mall, not at my house.
Having a dog is a great idea. More dogs is more better. They give good kisses, they’re loyal to the death, they will keep you warm on the couch, and a barking dog is a well known deterrent for burglary. I would suggest you not get a dog only for home defense, because they get expensive. I really am quite fond of ours. Consider that a burglar might check to see what parts of your house the dogs can’t get to and break in there. That’s just something to think about.
Blood Thirsty Savages.
If you don’t want a dog, then why not make it seem like you have a dog? Get a well chewed toy from a friend’s dog, a water bowl, and maybe a ‘Beware Of Dog’ Sign and hang it on the fence. Plant the seed of doubt in the bad guy’s mind.
Get an old radio and a lamp and put them on a cheapo Lighting Timer. Have the radio play during the day and the light come on a few times at night. Most burglars don’t want to tangle with the home owner.
Don’t leave the tools of the trade laying around your house. The ladder under your porch? That makes a great escalator to reach your second story. The hammer you left by the garage? Universal key. Don’t make it easier for them. Put a bike chain on the ladder rungs and lock it to your porch. Clean up your tools.
Don’t do this, silly.
Layer 3: Physically Harden the Entrances
If you have old style wooden framed windows, Security Pins are cheap and easy reinforcement. All you need to install them is a drill. If you have newer vinyl windows, Vinyl Window Lock simply tighten to the track, and prevent movement of the window. Be sure to keep the key to the pins on the top of the frame of the windows so in case you need to open the windows in a hurry (FIRE) you can.
If you have deadbolts, be sure the ones near windows are keyed and you remove the keys when not in use. Being able to smash the window and unlock the deadbolt sort of defeats the purpose.
Consider removing or putting a security film on the windows of your garage.
Installing Security Strike plates is another simple upgrade that anyone can do. I had no trouble completing the job using a drill and a dremel tool. Make sure you match the existing hardware colors, because wives don’t like mismatched door hardware (ask me how I know). I have read in several places that the average amount of time a burglar spends trying to gain entry is about 60 seconds, then they lose interest and look for greener pastures. The increased number of longer screws and thicker gauge metal should both help to slow entry. This buys you time if you’re home during the break-in and might make a burglar fear too much attention if he has to keep kicking the door if you’re not home.
6 – 3″ screws is more than 2 – 1/2″ screws. It’s science.
Layer 4: Early Warnings
Let’s say today is your day. The guy is coming in, brought the right tools to defeat your reinforcements (or you left something unlocked or wide open), and found a door that your dogs can’t reach. If you have a monitored alarm system, hopefully this is where that takes over and the coppers are on the way. A huge fear of mine is waking up and the bad guys are right outside the bedroom. The lack of time makes my palms sweat. That would be a bad day. Let’s say you don’t have the option of a monitored alarm system. What can you do?
Put an old baby monitor in a distant room, and the receiver in your bed room. If someone starts shuffling around in the garage or basement, you’ll hear it. Plenty of time to get the cops on the line and get your gear on.
This Security Alarm Kit is great both as a deterrent and as an early warning. They are LOUD. The units work via a magnet that keeps the alarm silent when it’s next to the unit, and sets it off when it’s separated. It will shut off as soon as the magnet is put back in place. My personal hope is that as soon as the 120 dB alarm starts blaring, the bad guy remembers a previous engagement and leaves. I have several of these strategically placed in the remote areas of my house and I can hear them from anywhere in the house. I’m really pleased with these so far. They also work well for apartments or dorm rooms. Recommended.
Place a convex mirror (I used a baby car mirror) outside of your front door, where you can see it from your peephole. Put it in a place that allows you to see the blind spot to the immediate left and right of your door. Being able to see 180 degrees outside of your front door gets rid of any hiding spots that someone could use for an ambush when you open the door for that nice gentleman who needs to use a phone.
“Pardon me, You got any of them phones I can use?” Seems legit.
Layer 5: The Safe Room
We’ve discussed this briefly in previous posts. There’s also many resources about this online. Do some googling and reading.
Layer 6: You
I’d be remiss if I didn’t remind you that in order for all of this gear to work, you have to have the Mindset to implement it. You have to have the presence of mind to set your alarms, change the batteries, lock the doors, not open the door for just anybody, not leave the new flat screen TV box visible to all passersby on trash day, create plans and train your family, and so on. We are usually our home’s biggest security weakness. Be a tougher nut to crack.
This is a short post about pistol shooting technique. One of my readers noticed that I was using a traditional strict vertical one handed shooting technique. Like most things, it’s been a work in progress. Here’s my reasoning for using a more traditional vertical hold instead of a more canted ‘high speed’ one handed technique.
I was taught during my first firearms class (Fighting Pistol – Tactical Response) that a good way to shoot one handed (strong hand) was have the slide of the gun canted slightly inboard while shooting. Think of throwing a cross in boxing. The hand is unwinding and the fist is about 15 degrees from vertical. It definitely feels more natural and is more comfortable to do this. It also can be pretty repeatable as you ride the recoil between shots, though I feel like I have to steer the gun a bit to get it to return to my original point of aim. More so the larger the caliber gets (physics, duh). The shot impulse is absorbed in the shoulder and triceps.
Strong Side Canted
Within the last two years, based on recommendations from The Tactical Professor I started trying the more traditional ‘up and down’ slide when one handed shooting. It has definitely felt more stable and the gun cycles in a more predictable path, requiring less ‘muscling’ of the gun during recoil. It also is more congruent with my method of pressing the gun out after the retention position of my draw stroke. The muzzle comes horizontal and under the dominant eye early and rises up and out from there. The engineer in me was curious whythis method seems to feel more stable.
Vertical one handed shooting.
I was reading Becoming a Supple Leopard which is a fantastic book about bio-mechanics as they relate to functional movement and sports. The part that grabbed my attention was regarding the shoulder and creating stability in the shoulder joint and I had sort of an epiphany.
Full vertical at Rogers Shooting School
The best way to tie the shoulder and humerus together is to externally rotate the humerus, thus winding up the ligaments of the shoulder. Kelly Starrett demos this by winding a rag around the end of a mop handle, which is a good visual. The more you rotate the broom, the tighter the rag gets. This is why we try to ‘bend the bar’ during bench press. This protects and stabilizes the shoulder. So my thinking is that the winding up of the shoulder ties the arm to the torso and stiffens that connection to remove degrees of freedom from the recoil impulse. This makes for a more repeatable recoil path.
It also happens to be a more traditional way to shoot one handed (as you probably know). I haven’t made my mind up on my favorite method. I tend to lean towards the vertical method, even though it bucks the current fashion of a ‘half gansta’ type hold. The true test is to put both on a timer and let the data speak for itself, which I admit I haven’t done. This is a subtle and probably trivial thing, but it’s the kind of thing that keeps me interested.
Your Grandfather shot Nazis like this.
Note: For weak handed shooting, a slight cant is needed to bring the sights across to the dominant eye.
Remember, this isn’t THE way, only A way. You get to make the decision for yourself, which is nice.
What’s your favorite technique?
Why?
I seriously am curious. Let me know what you do and why. Thanks for reading.